
Despite VR having been hyped up for the last couple of years, not very much has happened in the past two years. The hardware has not really refreshed, but this year at least one new exciting entry has come in and another is promised. Search results of reviews usually have the same group of suspects but usually leave out two important companies that are definitely worth a view. Surprisingly, setting up your VR headset is not a question of plug and play. It’s a bit finicky and takes some time. Games need to be optimised and you will run into strange new terms and things you need to run (Windows Mixed Reality, SteamVR, Windows Mixed Reality for SteamVR, OpenXR) and settings you need to optimise per game. This article offers a primer on that. Despite this, the experience in games is quite amazing!
Tethered or Untethered
Options and Specifications
Headsets
Specifications Table
Software Setup
Optimising Graphics Settings
Troubleshooting
Tethered or Untethered
First you need to make a decision on how you want to use your VR goggles. They come in the types Tethered (which has a cable connected to the PC) or untethered, which uses wireless communication of some sort to send the image signal.
The biggest advantage of tethered is that the cable data throughput is much much higher, allowing for much more detail and higher framerates (which are important for some games, especially simulators. If you are going to use your VR headset in Flight Simulator 2022, Elite Dangerous, Star Citizen, Star Wars Squadrions, driving sims, etc you really will need a tethered headset). The disadvantage is that walking around can be a bit more tricky as there is a cable to mind. Considering the length of cables (6m +) this doesn’t have to be a problem, especially if you are sitting down. There are also pulley arrangements available to have the cable come off the ceiling if you don’t mind how that looks.
The biggest advantage of untethered is that you can wander around easily without tripping on a cable.
Speaking of wandering around, one of the first things you do when you install the headset is set up a border with your headset delineating where you can and can’t walk so you won’t bump into things like your walls, chairs, desk, etc.
Most manufacturers also have a “pro” version which is better. As this article is for gaming, I will leave these out.
Options and Specifications
Then come a plethora of options to look at. For the specifications, higher is usually better (unless you are talking about latency and weight). You do pay for the privilege though:
- Resolution – be careful, sometimes it’s a per eye resolution, sometimes it’s a total resolution for both eyes. Sometimes there is just one display and sometimes there are two displays (one for each eye). Two is better.
- Field of View (FOV) – this can be both vertical and horizontal and is expressed as an angle.
- Camera system – some VR sets (the Quest 2 and the Pico 4) have a camera mounted on the helmet so you can “see” through the headset when turned on (Passthrough). The Pico 4 is colour and very good, the Quest 2 is black and white. Some VR sets offer eye tracking inside your headset. Some systems use these camera’s to see the controllers as a tracking system. (see video from 13 minutes)
- Tracking system – an external tracking system (base station) is best (but takes up space) and your controllers won’t lose tracking so often. Camera’s on the headset can be confused if it is too dark or light or if you swing your controllers out of the field of view.
- Controllers – some people prefer some controllers to others, eg the HP Reverb G2 has a bad reputation for it’s controllers and the Pico 4 design is praised. Sometimes you can use other system’s controllers, eg you can use the HTC Vive controllers on the HP Reverb G2 and the Valve Index. Check to see if the controllers are in the box you buy (if you want them. If you’re upgrading headset you may not want them).
- Data throughput – is the data throughput sufficient for your needs?
- Refresh rate
- Peak Pixel Density (PPD) – Readability on the screen. Some screens are sharper than others
- Glare on the screen
- Amount of light bleed – light can get into the headset, which is a distraction. How well does the foam sit around your face.
- Comfort of the headband – also a function of foam, how easy the straps are to adjust
- Weight and balance – a heavier headset can be more comfortable than a lighter one if the headband is more comfortable and better balanced. I haven’t put weight in the table as this is a very subjective experience.
- Interpupillary Distance (IPD) or eye seperation configuration – is it easy to adjust this to your eyes?
- Software in the ecosystem – Meta has spent some time gaining exclusive software for the Quest 2 to entice you to buy their hardware, so if you buy something else you won’t be able to play their games. the PS5VR system only works on a Playstation 5.
- If you wear glasses, check the size of the glasses spacer – sometimes you can find aftermarket spacers.
- Sound quality / Microphone
- Ease of setup!
I have a comparison table at the end.
The Headsets
I have divided this into 2 parts – the standard list you will have seen everywhere, the extended list contains headsets not so frequently indexed by Google.
The standard list:
- Meta Quest 2 for EUR 449,-
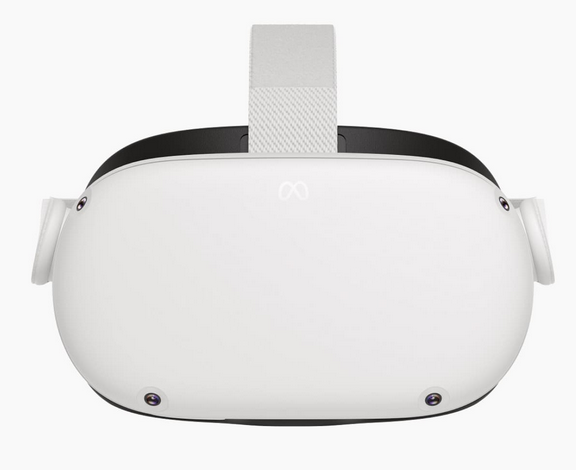
Until the coming of the Pico 4 this was the ‘best value’ option. However, you are being tracked in everything you do by Facebook – it requires a Facebook account login, so for me personally, this makes it a no go. It’s a few years old by now and a bit outdated. Enough said.
Find it here: https://www.meta.com/fi/en/quest/products/quest-2/
- HTC Vive Cosmos Elite
The affordable option to for the low end of the market. Tethered. $449 headset only, full kit $749.
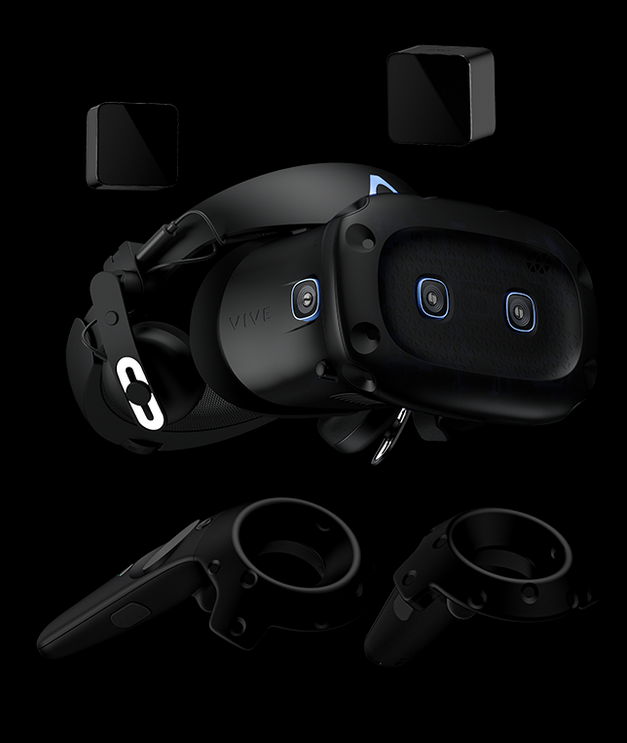
- HTC Vive Pro 2
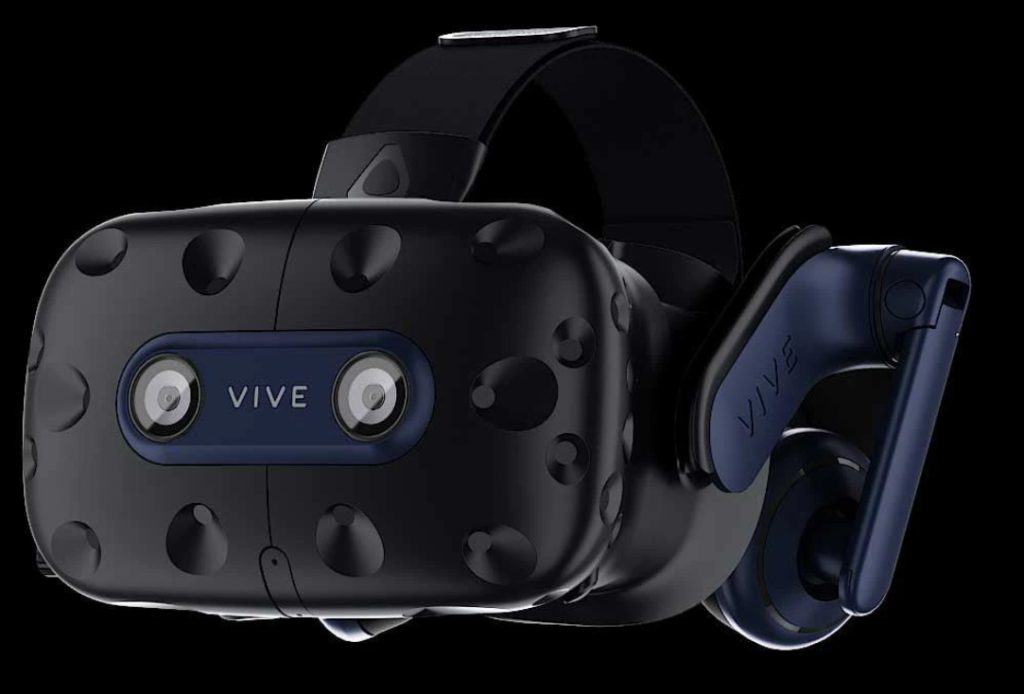
The better VR Set. This is the high spec standard unit (but not the highest spec on paper!). Tethered. The controllers are often used by owners of the Valve Index and the HP Reverb G2. $799 without kit, $1399 with base station and 2 controllers. You can buy trackers for your arms and legs seperately. Using a wifi kit can be turned into an untethered unit.
- Valve Index
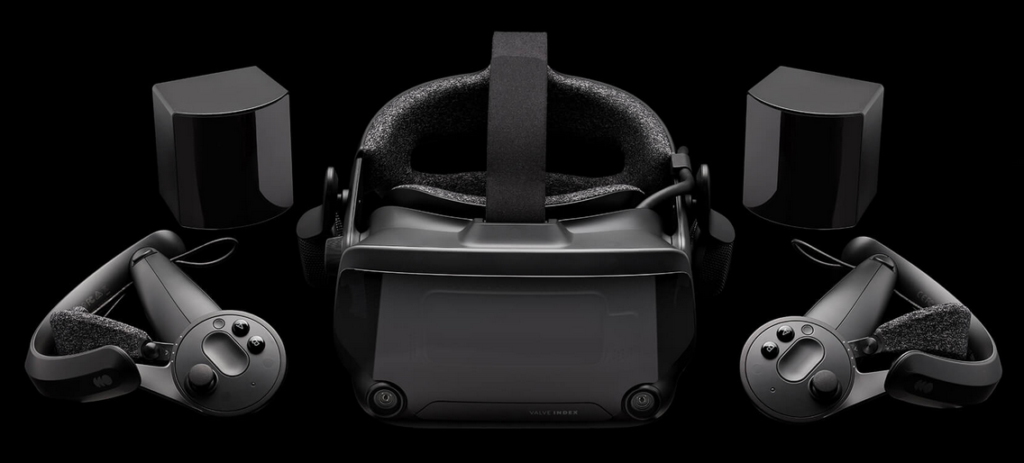
The upper midrange unit. Tethered with base station. $1079,- for the full kit, $539,- only the headset.
The extended list
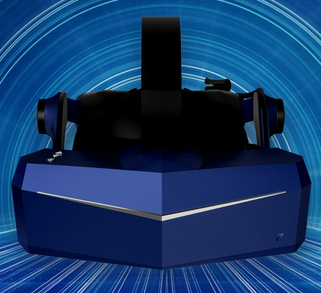
- Pico 4
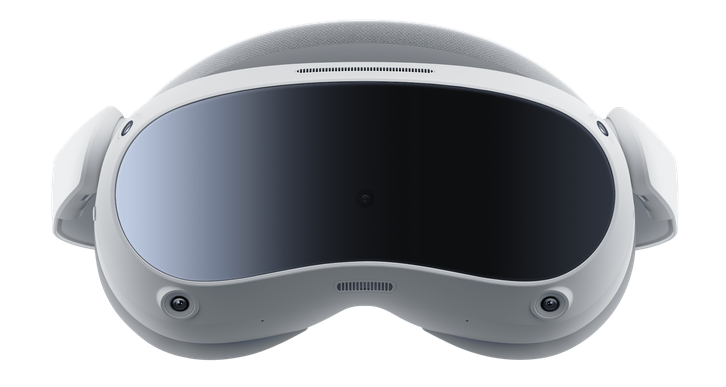
The newest addition to this list – and everyone is raving about it. The new (2022) technology is a step up for everyone. Untethered (unfortunately, as I’m a simmer!). $429,- with 128 GB, $499,- with 256 GB. You only need the extra memory if you want to load games from the eco system on the device. If you PC game apparently this is not necessary. Also see the video above if you want to know more about this device.
Note: It’s a Chinese product created by ByteDance – the owner of TikTok. Whilst there is no proof that I have found yet that this is a data grabbing monster (but please correct me if I am wrong) there is plenty of fingerpointing at ByteDance and TikTok is!
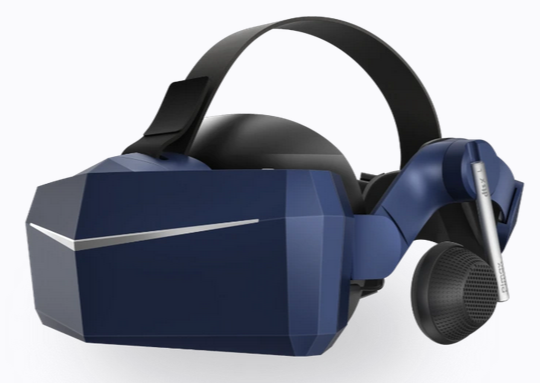
- HP Reverb G2v2
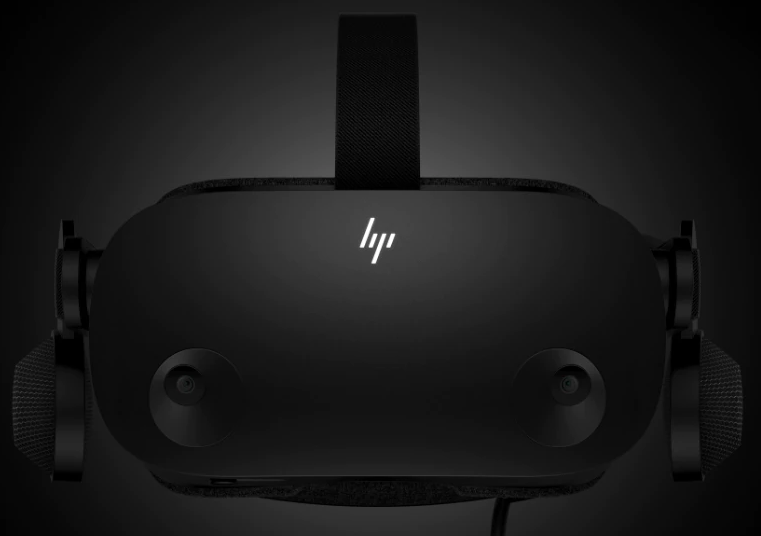
Tethered. A very good upper mid range with the sharpest screen and best audio. A very popular choice for simming. $650,- for the complete set. Make sure you get a v2 version – you can recognise this by the cable having a box on it with a button to turn it on and off and the headset itself having 2 magnetically removable pieces (glasses spacers) in front of the screen – they also look different
There is a problem with the cable guide which in some cases makes it snap in half. You can contact HP for a RMA for this. There are rumors that HP is getting out of the VR business.
- Varjo Aero
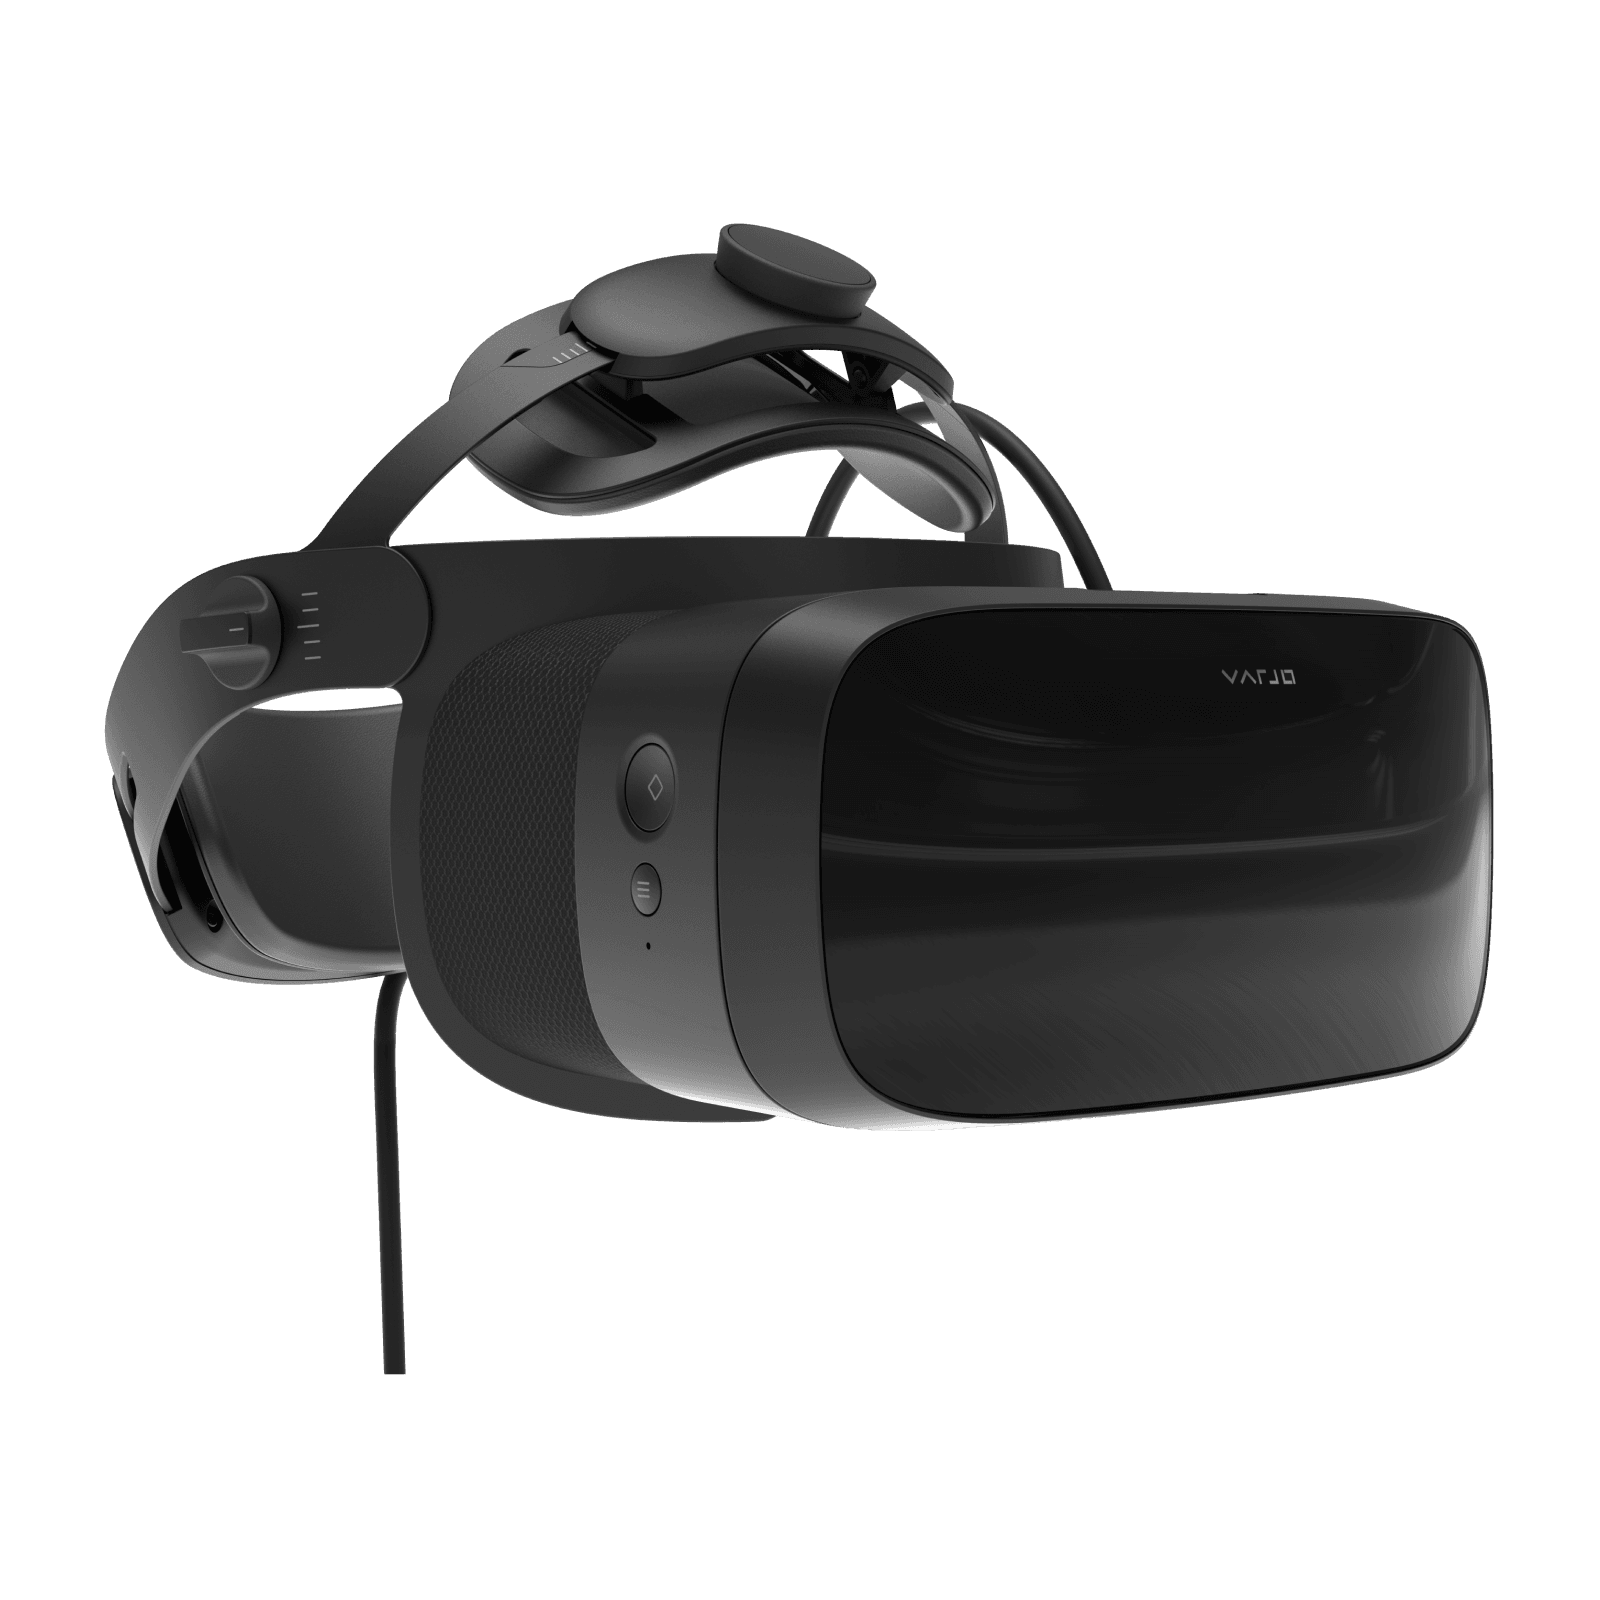
The absolute top end, tethered. EUR 1999,-.
- Pimax 5K Super
Great specs, but apparently setup is fiddly. EUR 641,- and EUR 289,- for the controllers. Optional hand and eye tracking modules and I am unsure if you need to buy the headphones seperately.
- Pimax 8K X
Great specs, but apparently setup is fiddly. $1179,- and EUR 289,- for the controllers. Optional hand and eye tracking modules and I am unsure if you need to buy the headphones seperately.
- Pimax 12K
To be released. Hopefully.
Specifications Table
| HTC Cosmos Elite | HTC Vive Pro2 | Valve Index | Pico 4 | HP Reverb G2V2 | Varjo Aero | Pimax 5K Super | Pimax 8K X | |
| Resolution | 1440 x 1700 pixels per eye (2880 x 1700 pixels combined) | 2448 × 2448 pixels per eye (4896 x 2448 pixels combined) | dual 1440×1600 RGB LCDs | 2160×2160 per-eye | 2160 x 2160 pixels per eye (4320 x 2160 pixels combined). RGB sub-pixels | Dual Mini LED LCD; 2880 x 2720 px per eye | 2560 X 1440 pixels per eye (5120 X 1440 pixels combined) | 3840 X 2160 pixels per eye (7680 X 2160 pixels combined) |
| Field of View | Up to 110 degrees | Up to 120 degrees (horizontal) | Optimized eye relief adjustment allows a typical user experience 20º more than the HTC Vive | 105 degrees | 114 degrees | Horizontal: 115° Diagonal: 134° at 12 mm eye relief |
Diagonal 200 degrees | Diagonal 200 degrees |
| Refresh Rate | 90 Hz | 90/120 Hz (only 90Hz supported via VIVE Wireless Adapter) | 80/90/120/144Hz (144Hz experimental) | 72Hz / 90 Hz | 90Hz | 90Hz | 90/120/144/160/180Hz* *Higher refresh rates are only available at lower FOV settings. |
60/75/90Hz (native mode) 110Hz (upscaling mode) |
| Tracking system | 6DoF Inside-out Tracking | SteamVR™ Base Station Tracking 2.0 | SteamVR 2.0 sensors, compatible with SteamVR 1.0 and 2.0 base stations | 6 DoF positioning system | HP Reverb G2 inside/out 6 DOF motion tracking, gyroscope, accelerometer, and magnetometer | SteamVR™ 2.0/1.0 Eye tracking 200 Hz with sub-degree accuracy; 1-dot calibration for foveated rendering |
G-sensor, gyroscope, SteamVR 1.0 and 2.0 Tracking System | G-sensor, gyroscope, SteamVR 1.0 and 2.0 Tracking System |
| Headphone | Stereo Headphone | Hi-Res certified headset (via USB-C analog signal) Hi-Res certified headphones (removable) High impedance headphones support (via USB-C analog signal) |
Built-in: 37.5mm off-ear Balanced Mode Radiators (BMR), Frequency Response: 40Hz – 24KHz, Impedance: 6 Ohm, SPL: 98.96 dBSPL at 1cm. | 3.5 mm audio jack | 3.5mm audio jack (integrated microphone) | 3.5mm audio jack (integrated microphone) | ||
| Microphone | Integrated microphones | Integrated dual microphones | Dual Microphone Array, Frequency response: 20Hz – 24kHz, Sensitivity: -25dBFS/Pa @ 1kHz | In-ear headphones with mic in-box | ||||
| Connections | USB 3.0 (or later), DP 1.2, Proprietary Connection to Faceplates | Bluetooth, USB-C port for peripherals, DP 1.2 (DP 1.4 required for full resolution) | 5m tether, 1m breakaway trident connector. USB 3.0, DisplayPort 1.2, 12V power, Aux Headphone Out 3.5mm | DisplayPort™ 1.3, USB 3.0 type C, power adapter | Headset adapter and USB-C cable (5-metre) in-box PC connections: DisplayPort and USB-A 3.0 |
1 x DisplayPort 1.4 1 x USB 3.0 Type A 1 x USB 2.0 Type A |
1 x DisplayPort 1.4 1 x USB 3.0 Type A 1 x USB 2.0 Type A |
|
| IPD | Adjustable Eye Comfort Setting (IPD) | Adjustable IPD range of 57-70mm | 58mm – 70mm range physical adjustment | 62 – 72mm best adjustment system | 64mm +/- 4mm by hardware slide | Automatic IPD adjustment with motor Supported IPD range: 57–73 mm |
60mm – 70mm range physical adjustment ± 2mm with software adjustment | 60mm – 70mm range physical adjustment ± 2mm with software adjustment |
| Camera | Stereo 960 x 960 pixel, global shutter, RGB (Bayer) | 2 front-facing cameras and 2 side-facing cameras, | ||||||
| PPD | 20.6 | 35 |
Software Setup
When you set up a VR headset, you will need to download and install Windows Mixed Reality from the Windows App Store. After setup You most likely will need to install SteamVR. SteamVR allows you to play games, even if they were not bought in the Steam Store (eg in the Epic store). You will also need to install Windows Mixed Reality for Steam. https://learn.microsoft.com/en-us/windows/mixed-reality/enthusiast-guide/using-steamvr-with-windows-mixed-reality.
Do you need to install OpenXR?
Use OpenXR
From your computer, open the SteamVR app
Head to Settings
Select Show in Advanced Settings
Head to the Developer tab
Set Current OpenXR runtime as “OpenXR runtime”
Sign up for betas
This is advised by Microsoft in their guide https://learn.microsoft.com/en-us/windows/mixed-reality/enthusiast-guide/using-steamvr-with-windows-mixed-reality
In Steam, use the drop-down under the Library menu to filter to Tools.
In the list, right-click SteamVR and select Properties.
Select the Betas tab.
Opt in to “beta – public beta” and select Close to confirm. The beta access code field should be left blank.
In Steam, use the drop-down under the Library menu to filter to Software.
In the list, right-click Windows Mixed Reality for SteamVR and select Properties.
Select the Betas tab.
Opt in to “beta – public beta” and select Close to confirm. The beta access code field should be left blank.
Optimising your Graphics settings
Motion Reprojection
With it entirely off there is a bit of stuttering, but detail clarity is very sharp. With it on motion is fluid
Disable overlays
- Epic: C:\Program Files (x86)\Epic Games\Launcher\Portal\Extras\Overlay and rename or move the two files:
EOSOverlayRenderer-Win64-Shipping.exe
EOSOverlayRenderer-Win32-Shipping.exe - Steam: settings>In Game>Enable Steam Overlay while in-game UNCHECK
- XBOX: Disable the Xbox Game Bar overlay (yes on windows) Enter windows settings from the start menu, Select Gaming -> Xbox Game Bar -> Toggle the overlay to the off position
External Apps
https://store.steampowered.com/app/908520/fpsVR/ – fpsVR
Troubleshooting
not enough virtual memory can be a problem
https://forums.flightsimulator.com/t/crash-to-desktop-without-error-message/130085 – limit fps in nvidia control panel
https://forums.flightsimulator.com/t/crash-to-desktop-without-error-message/130085/3244 – The HP Reberb G2 goes to sleep after a while despite the change in the registry, and to have prevent the sleep in the device manager. I switch it to VR and it starts again. We are now at 4 hours of flight. And 0 CTD
In Device Manager → Universal Serial Bus (USBs) controller go through each device and in the “Power Management Options” tab uncheck “Allow the computer to turn off this device”. SteamVR settigns Startup/Shudown
https://www.reddit.com/r/HPReverb/comments/xo5v2z/holographicshell_processwindows_11_performance/ – Run cmd/terminal and paste ‘logman query HolographicShell -ets’ to see if it’s running. If it is, end it using ‘logman stop HolographicShell -ets’ and check
Can’t see steamVR settings – click on icon in taskbar, right click on settings window, select ‘move’ use the keyboard arrows to move it to main display
If you have a large monitor you can run into the problem that your monitor will move all the icons to the top left when it turns off. To stop this you either need to get an EDID pass through adapter, but a hdmi edid pass through adapter has to work for the given resolution as well as the refresh rate – and for > 60Hz at 4k (HDMI 2.0 specs) must be HDMI 2.1 compatible. There is not much in the >4K@60Hz space and what is there, is expensive.
You can try https://social.technet.microsoft.com/Forums/windows/en-US/8e35fe49-6f89-4476-b138-c24a93d98089/change-the-screen-resolution-using-registry-or-command-line registry settings.
https://www.tenforums.com/graphic-cards/10681-tutorial-how-change-windows-10-default-resolution.html
https://community.spiceworks.com/topic/1108325-windows-10-set-default-resolution
Good luck and have fun – playing Elite Dangerous is a whole new experience in VR!

Robin Edgar
Organisational Structures | Technology and Science | Military, IT and Lifestyle consultancy | Social, Broadcast & Cross Media | Flying aircraft