[…]
What is pyramid salt?
Pyramid salt crystals are made of the same stuff as regular salt. But these crystals look different because they formed in a different way.
In nature, these elusive crystals grow on the surface of quiet, undisturbed pools of salt water that evaporate under the hot sun.
Pyramid salt is more expensive than regular salt, because they taste saltier. Pyramid salt is hollow, and gram for gram, it dissolves in your mouth faster than regular salt. So the saltiness comes at your taste buds all at once.
Plus, they also look awesome.
Now, it’s easy to make regular salt crystals at home. Just leave a dish of salt water to evaporate, and you’ll get white powdery salt inside after a few hours.
However, it’s much harder to make pyramid salt.
True, you can buy them online. Maldon Sea Salt, for instance, contains crunchy pyramidal salt crystals. They are made by evaporating sea water in large heated pans, mimicking nature.
But that kind of salt is produced industrially, with special equipment and mineral rich seawater.
I’ve always wondered whether you could grow pyramids at home using a hot plate, a glass dish and some regular table salt.
It took over 100 experiments and some sleepless nights, but here are the results.
How to make pyramid salt crystals
This guide will consist of the following parts:
- Materials
- Preparing the salt solution
- Growing the pyramid salt crystals
- Harvesting the pyramid salt crystals
- Storing the pyramid salt crystals
- Tasting the pyramid salt crystals
- 8 types of pyramid salt crystals
- Some more information
- Summary
Materials
To make pyramid salt crystals, you’ll need:
- A bag of salt
- Alum powder
- A stove/hot plate
- A heat resistant glass dish
- A pair of tweezers
- A thermometer (optional)
I have tried table salt, sea salt, and Himalayan rock salt, and they all work. Sea salt seems to give better results.
I’ve used both tap and deionized water. Both are fine.
Also, in this experiment, we’ll be heating some very concentrated salt water. This solution will damage metallic objects, so you can’t use a stainless steel pot.
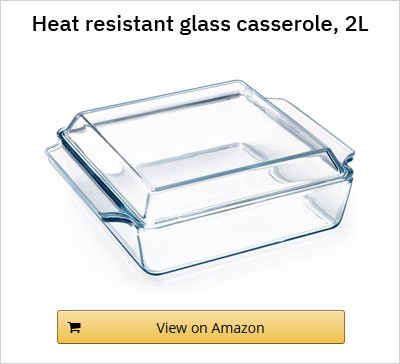
Instead, I suggest using a heat resistant glass dish. The exact type doesn’t matter. You can use a Pyrex dish or an enameled cast iron pot, which won’t get corroded.
I used a glass casserole.
Preparing the salt solution
Dissolve 165 g of salt in 500 mL of hot water. If you want to make a bigger batch, just use the same ratio (e.g. 330 g of salt per 1 L of water).
Stir the solution gently until all of it dissolves.
Depending on whether the salt is dirty, you can choose to filter it. I filtered mine.
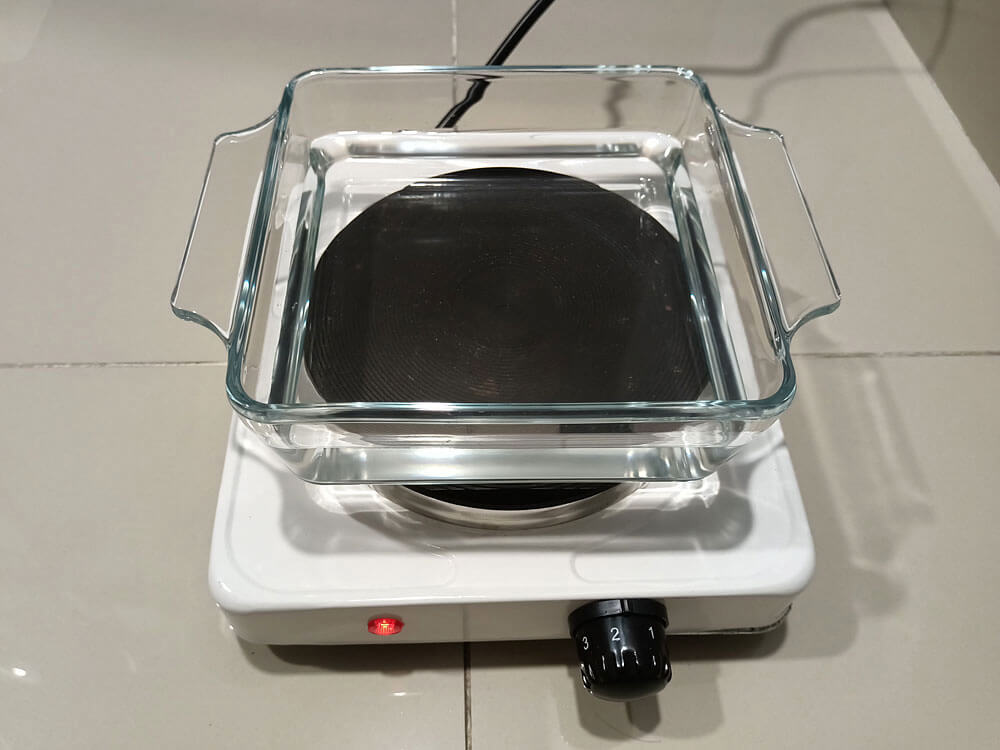
In my setup, I poured my filtered salt solution into a glass casserole sitting on top of a hot plate.
A hot plate is fine. But don’t put the glass dish directly on the gas stove – the glass might break due to strong, uneven heating, even though it is technically heat resistant. Use a water bath instead.
Growing the pyramid salt crystals
Now, heat the solution to 60-70°C and keep it there throughout the growing process.
When the solution warms up, convection currents start forming, causing the surface of the solution to swirl around.
This is bad news, because when our pyramids form, they will also move around the surface of the solution. And they will bump into each other, stick together and fall to the bottom of the dish.
The key is to add an ingredient called potassium alum. Alum calms the surface and helps the pyramids form. It is normally used in baking and pickling. You can find it at the grocery store, or buy it online.
Add 0.5 g of alum per 500 mL of salt solution. No need to measure – just drop a few pea-sized pieces of alum/two pinches of alum powder into the solution and let it dissolve.
Several minutes after the alum has dissolved, the surface of the solution should start to settle down. Check out this GIF:
I placed a cork on the surface of the solution to visualize the movement on the surface. Before adding alum, the cork swirled around. After adding alum, the cork was completely motionless.
Good. Now you just need to wait.
It takes about 30 minutes for the salt solution to reach saturation, which is the point where salt crystals start to form.
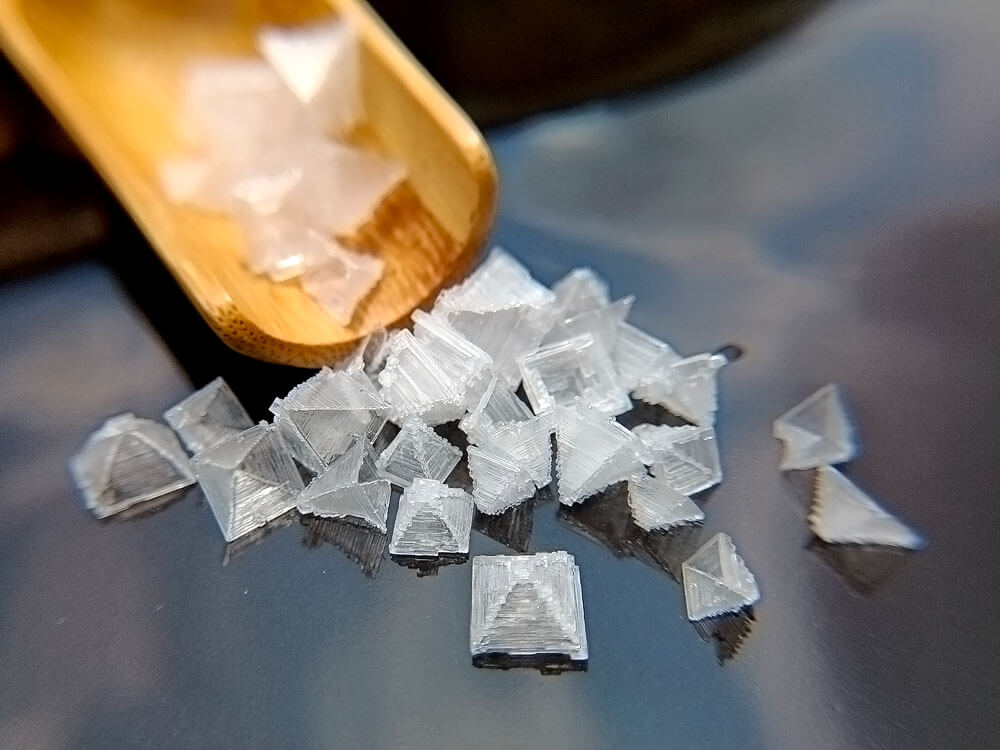
Eventually, small white squares will appear on the surface of the solution.
Those are baby pyramid salt crystals.
They’ll keep growing, and within 15 minutes they’ll look like this:
The crystals are actually upside down pyramids, suspended on the surface of the solution due to surface tension. It’s the same principle that lets some insects walk on water.
Here’s what they look like from the side:
As the pyramid salt crystals get heavier, they sink lower into the solution. But evaporation on the surface causes the base of the pyramids to grow outwards, widening it and forming a staircase pattern in the process.
Super cool.
Here’s a time lapse of the growing process over 1 hour:
As the pyramids get larger, they risk bumping into their neighbors.
Usually, it isn’t a big problem – unless your solution is too hot. If you heat it beyond 80°C, the pyramids quickly join together to form a layer of crust.
But even at 60°C, you shouldn’t leave them there, because they might get too heavy and fall to the bottom to the dish.
So it’s time to harvest the pyramids.
Harvesting the pyramid salt crystals
Using a pair of tweezers, carefully remove the pyramid that you want, and place it on a piece of tissue paper. The paper will soak up excess salt solution.
Before you remove the second pyramid, dip the tweezers in a cup of water. This step ensures that there are no powdery salt grains sticking to your tweezers – which will cause thousands of tiny crystals to form in the dish.
Then, dry the tweezers with a tissue, and remove your second pyramid. Rinse and repeat.
Instead of using tweezers, you can also use a sieve to scoop up those pyramids. Remember to dip the sieve in water after every run.
Wash your tweezers after every run to prevent powdery salt grains from forming.
You can keep doing this until the salt water starts to dry out. By this time, you should have quite a few pyramids.
And that’s it!
You’ve just made the fabled pyramid salt, also known as fleur de sel, flower of salt, at home.
If you want to make more pyramids, just add some water to the dish and wait for all the salt to re-dissolve. Then repeat the process. This time, you don’t need to add alum.
Re-dissolving the salt to make more pyramids.
Storing the pyramid salt crystals
Just store them like regular salt.
If you live somewhere humid, the crystals will absorb moisture from the air and get slightly wet. This will cause part of the pyramid’s base to dissolve.
It’s no big deal, but if you want to prevent this, store the pyramid salt crystals with a desiccant.
[…]
Summary
That’s all for now. I have been trying to grow pyramid salt crystals for a very long time, and I’m glad to share what I’ve learnt with you. Hopefully you found the guide useful.
Here’s a super short summary of what we’ve covered.
To grow pyramid salt crystals, you’ll need:
- A bag of salt
- Alum powder
- A stove/hot plate
- A heat resistant glass dish
- A pair of tweezers
- A thermometer (optional)
- Dissolve 165 g salt per 500 mL of water.
- Heat the solution to 60°C.
- Add 0.5 g alum per 500 mL of solution.
- Wait for pyramids to form.
- Remove the pyramids with tweezers.
- Dry and store them with a desiccant.
- Enjoy your pyramid salt. […]
Source: How to Easily Make Your Own Pyramid Salt Crystals – Crystalverse

Robin Edgar
Organisational Structures | Technology and Science | Military, IT and Lifestyle consultancy | Social, Broadcast & Cross Media | Flying aircraft